- Gender
- Male
- Country
- Select..
----------Greetings Everyone----------
PS. If you need help how to connect MemoryPatch with MOD Menu , and game functions let me know

I'd like to share with you a new MOD Menu, which is extremely good ,
because it is for android games that are not just Unity, you can now MOD Menu
il2cpp and other native android games
You can now MOD Menu this Games!
This is how it Looks Live


For this Tutorial you will need this Tools!
- Android Studio 3* = Download Link!
- APKTool (SBennyAPKT is Good) = Download Link!
- Notepad++ = Download Link!
* Floating ModMenu Repository = Download MOD Menu Project! // Original Author Link MrIkso
* knowledge of C ++, Java, Smali
+-Advanced Modders Recommended
Let's Start with Tutorial!
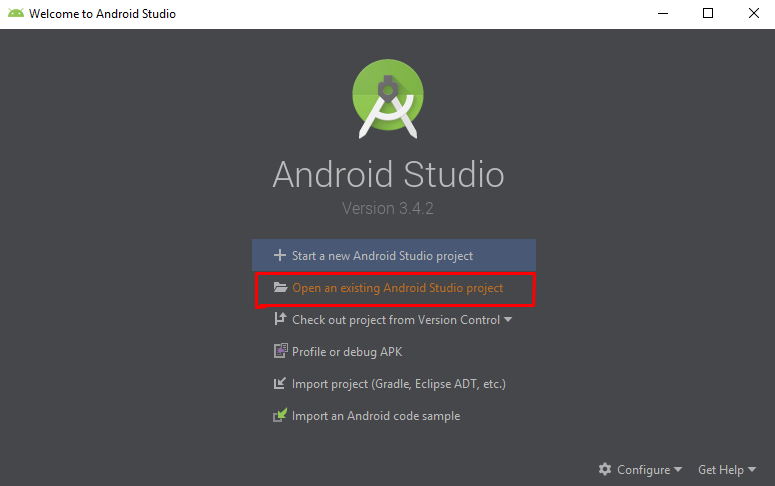
Once you've downloaded all the necessary files, the first thing you need to do is open Android Studio and open the Floating ModMenu Repository Project!
Extract ModMenu Project in the folder with out Space , just clear name ex. C:Users\xxxxxx\Desktop\Modding\FloatingModMenu-master
( "I'm saying this because I already had a problem compiling the game, and that was the FIX" )
Open the Project in Android Studio
After Loading your Project you will need to Locate to the FloatingModMenuService.java - in this method you will add Options for your MOD Menu.
You can Locate that file easy with Shortcut ( CTRL + SHIFT + F ) and then Search for
Code:
private void modMenu() {Now you can add your MOD Menu "Buttons" Cheat Options , here is some Example!
When you edit your Options for MOD Menu, open this file /FloatingModMenu/app/src/main/jni/src/main.cpp in this file you will need to edit functions that will implement the hook. Used library KittyMemory. ( This library aims for runtime code patching for both Android and iOS ) Next you need to call from the native library and connect them with switches.
This file is where you Connect MOD Menu Switches with in-game Functions!
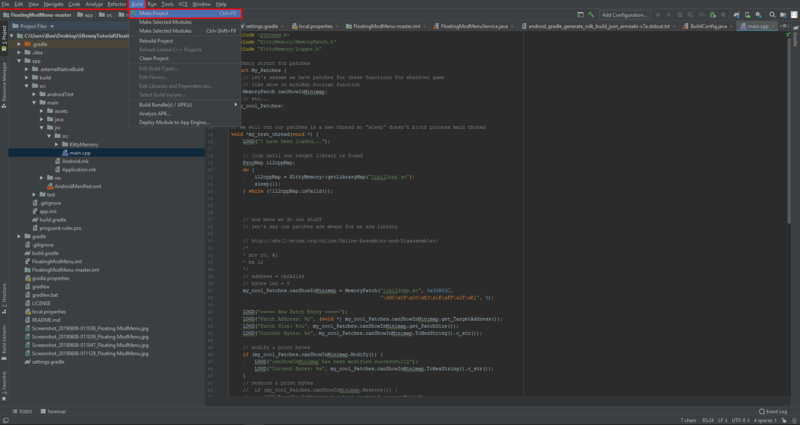
After you have added all the necessary options you can build this Project and Make APK!

Be sure that your Build is Successfully Completed with-out Errors!
Next step is to inject "Build ModMenu Stuff" into your Game folder!
Locate the file loction of build-ed MOD Menu APK.
Now you will need to Decompile the application with SBennyAPKTool, or any other tool.
and then you will need to Copy some stuff into your Game Folder!
it also requires you to Decompile your game, after you decompile MODMenu APK!
When you are Ready to Transfer Files from Created MOD Menu Apk, Copy this Files into your Game Folder
Copy Assets folder into your game Assets folder (This is MOD Menu Images)
And You need to copy libKittyMemory.so into Correct Game Structure....(blabla)
but be careful move libKittyMemory.so Manually because it depends what structure your Game Use, and which one you are Hacking!

libKittyMemory.so is located in this Folders, copy only folder that your Game use.

Next, we need to add permission to display the application on top of others and the Mod-Menu service.
Open AndroidManifest.xml from the game folder
and Add this Code in the first line of Permissions!
Code:
<uses-permission android:name="android.permission.SYSTEM_ALERT_WINDOW"/>
Code:
<service android:enabled="true" android:exported="false" android:name="com.mrikso.modmenu.FloatingModMenuService"/>
Next step is maybe the most difficult because you need to find main activity of your game, and you need to inject your MOD Menu.
You need to register the MOD Menu call and the libKittyMemory library load.
We are looking for the main activity of our game. Usually it is written in <application> (Here is Example of "My Game")

Code:
<application android:allowBackup="true" android:icon="@mipmap/app_icon" android:label="@string/app_name" android:name="android.support.multidex.MultiDexApplication" android:supportsRtl="true" android:theme="@style/UnityThemeSelector">
    <service android:enabled="true" android:exported="false" android:name="com.mrikso.modmenu.FloatingModMenuService"/>
        <activity android:configChanges="density|fontScale|keyboard|keyboardHidden|layoutDirection|locale|mcc|mnc|navigation|orientation|screenLayout|screenSize|smallestScreenSize|touchscreen|uiMode" android:hardwareAccelerated="false" android:label="@string/app_name" android:launchMode="singleTask" android:name="com.unity3d.player.UnityPlayerActivity" android:screenOrientation="portrait">
            <intent-filter>
                <action android:name="android.intent.action.MAIN"/>
                <category android:name="android.intent.category.LAUNCHER"/>
            </intent-filter>
            <meta-data android:name="unityplayer.UnityActivity" android:value="true"/>
</activity>In my case my Main Game Activity is located here.

When you know in what smali folder is your Main Activity you can copy Smali Folder from Decompiled MOD Menu Apk to Game Smali/Com/ Folder

Locate Game Main Activity (in my case UnityPlayerActivity ) and open it with Notepad++ , and copy class (This Code) to the main class of our game in the # virtual methods , you can paste it After Last Methode!
Code:
.method public Start()V
    .locals 3

    .line 23
    const-string v0, "KittyMemory"

    invoke-static {v0}, Ljava/lang/System;->loadLibrary(Ljava/lang/String;)V

    .line 24
    sget v0, Landroid/os/Build$VERSION;->SDK_INT:I

    const/16 v1, 0x17

    if-lt v0, v1, :cond_0

    invoke-static {p0}, Landroid/provider/Settings;->canDrawOverlays(Landroid/content/Context;)Z

    move-result v0

    if-nez v0, :cond_0

    .line 25
    new-instance v0, Landroid/content/Intent;

    new-instance v1, Ljava/lang/StringBuilder;

    invoke-direct {v1}, Ljava/lang/StringBuilder;-><init>()V

    const-string v2, "package:"

    invoke-virtual {v1, v2}, Ljava/lang/StringBuilder;->append(Ljava/lang/String;)Ljava/lang/StringBuilder;

    invoke-virtual {p0}, Landroid/app/Activity;->getPackageName()Ljava/lang/String;

    move-result-object v2

    invoke-virtual {v1, v2}, Ljava/lang/StringBuilder;->append(Ljava/lang/String;)Ljava/lang/StringBuilder;

    invoke-virtual {v1}, Ljava/lang/StringBuilder;->toString()Ljava/lang/String;

    move-result-object v1

    invoke-static {v1}, Landroid/net/Uri;->parse(Ljava/lang/String;)Landroid/net/Uri;

    move-result-object v1

    const-string v2, "android.settings.action.MANAGE_OVERLAY_PERMISSION"

    invoke-direct {v0, v2, v1}, Landroid/content/Intent;-><init>(Ljava/lang/String;Landroid/net/Uri;)V

    .line 26
    .local v0, "intent":Landroid/content/Intent;
    const/16 v1, 0x7d2

    invoke-virtual {p0, v0, v1}, Landroid/app/Activity;->startActivityForResult(Landroid/content/Intent;I)V

    .line 27
    .end local v0    # "intent":Landroid/content/Intent;
    goto :goto_0

    .line 28
    :cond_0
    new-instance v0, Landroid/content/Intent;

    const-class v1, Lcom/mrikso/modmenu/FloatingModMenuService;

    invoke-direct {v0, p0, v1}, Landroid/content/Intent;-><init>(Landroid/content/Context;Ljava/lang/Class;)V

    invoke-virtual {p0, v0}, Landroid/app/Activity;->startService(Landroid/content/Intent;)Landroid/content/ComponentName;

    .line 30
    :goto_0
    return-void
.end method

.method public onActivityResult(IILandroid/content/Intent;)V
    .locals 2
    .param p1, "requestCode"    # I
    .param p2, "resultCode"    # I
    .param p3, "data"    # Landroid/content/Intent;

    .line 34
    const/16 v0, 0x7d2

    if-ne p1, v0, :cond_1

    .line 35
    const/4 v0, -0x1

    if-ne p2, v0, :cond_0

    .line 36
    new-instance v0, Landroid/content/Intent;

    const-class v1, Lcom/mrikso/modmenu/FloatingModMenuService;

    invoke-direct {v0, p0, v1}, Landroid/content/Intent;-><init>(Landroid/content/Context;Ljava/lang/Class;)V

    invoke-virtual {p0, v0}, Landroid/app/Activity;->startService(Landroid/content/Intent;)Landroid/content/ComponentName;

    goto :goto_0

    .line 38
    :cond_0
    const/4 v0, 0x0

    const-string v1, "Draw over other app permission not available. Closing the application"

    invoke-static {p0, v1, v0}, Landroid/widget/Toast;->makeText(Landroid/content/Context;Ljava/lang/CharSequence;I)Landroid/widget/Toast;

    move-result-object v0

    invoke-virtual {v0}, Landroid/widget/Toast;->show()V

    .line 39
    invoke-virtual {p0}, Landroid/app/Activity;->finish()V

    goto :goto_0

    .line 42
    :cond_1
    invoke-super {p0, p1, p2, p3}, Landroid/app/Activity;->onActivityResult(IILandroid/content/Intent;)V

    .line 44
    :goto_0
    return-void
.end method
And the most Important thing is also in the same File, Main Activity smali to add this Code in onCreate Method
Code:
invoke-virtual {p0}, Lcom/unity3d/player/UnityPlayerActivity;->Start()V
Info on Renameing Activity Start Function!
Example : Let's say that your Main Activity Smali is Named HavanitosPlayerTutorial -> Lcom/ohyes/idamodding/activity/HavanitosPlayerTutorial.smali
When you add ( Start Load Function , in defined Activity you need to use that Activity Name )
This is Wrong:
Code:
invoke-virtual {p0}, Lcom/mrikso/modmenu/MainActivity;->Start()V
Code:
invoke-virtual {p0}, Lcom/ohyes/idamodding/activity/HavanitosPlayerTutorial;->Start()VThanks for Reading Tutorial , if you need any Help Feel Free to ask any Advanced Modder ! 
I hope you Understand my English and my Tutorial Enjoy

I hope you Understand my English and my Tutorial Enjoy
Attachments
-
7.8 KB Views: 289
-
68.5 KB Views: 292
Last edited:


